Ansible #
介绍 #
一款轻量级的自动化运维工具,只需要一台主机安装Ansible,便可以管理其他可连通的Linux服务器。
开源
python
特点 #
- 自动化引擎,实现管理配置,应用部署,服务编排及其他各种服务器管理需求;
- 使用简单,具有客户端的特点;
- 基于ssh实现配置管理;
- 依赖python;
- 功能强大,支持云服务操作。
安装 #
由于Ansible使用Python开发,所以可以直接使用pip安装
pip install ansible
也可以使用yum或apt-get安装
yum install ansible -y
apt-get install ansible -y

ansible --version
只需要在Control Node上安装即可。
主要概念 #
Control node:
安装了Ansible的主机都可以称之为Control node,反过来说,Ansible安装在Contriol Node上;
一般为linux机器(注:目前也已经对windows做了支持)。
Managed nodes:
待管理的网络设备或者服务器;
linux机器(安装了python)。
Inventory:
Modules:
Tasks:

Ansible配置 #
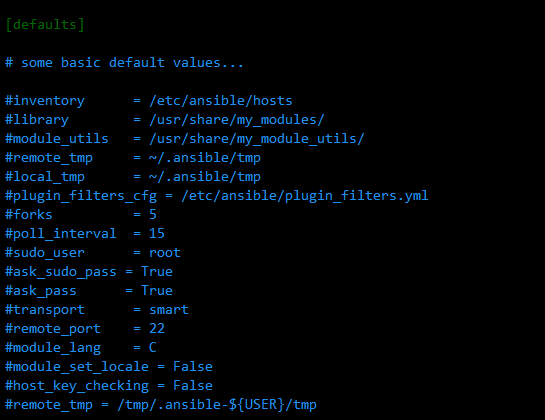
配置文件位置:/etc/ansible/ansible.cfg,为ini格式文件。
配置示例 #
inventory:主机清单配置文件位置,在使用Ansible命令时,也开始-i <path>指定;
host_key_checking:当know_hosts中不存在的主机(即尚未访问过的主机,是否需要输入密钥);
become_user:sudo用户;
主机清单(Inventory) #
在一个ini或yaml文件中管理Managed nodes清单,默认安装ansible后,在/etc/ansible/hosts文件中管理(后文统一称之为主机清单文件),一般是将maneged nodes的ip address或host name等信息存储到主机清单文件中。
Formats #
主机清单文件格式兼容两种:
ini,因为配置方便简单,一般常选。
mail.example.com

[webservers]
foo.example.com
bar.example.com
yaml
all:
  hosts:
    mail.example.com:
  children:
    webservers:
      hosts:
        foo.example.com:
        bar.example.com:
Hosts #
配置需要管理的主机host name或ip address。
Group #
如果想管理某一批主机,可以将这多个host配置到统一个group下。方便对这组主机的批量管理。
[webserver]
webserver01.com
webserver02.com

[dbserver]
dbserver01.com
dbserver02.com
Group变量 #
作用在group上的变量。
[webserver]
webserver01.com

[webserver:vars]
ansible_ssh_user=ubuntu
Nested group #
一个组包含其他组。
[allserver:children]
webserver
dbserver
Inventory内置参数 #
| 参数名 | 参数说明 |
|---|---|
| ansible_ssh_host | 定义主机的ssh地址 |
| ansible_ssh_port | 定义主机的ssh端口 |
| ansible_ssh_user | 定义主机的ssh认证用户 |
| ansible_ssh_pass | 定义主机的ssh认证密码 |
| ansible_sudo | 定义主机的sudo用户 |
| ansible_sudo_pass | 定义主机的sudo密码 |
| ansible_sudo_exe | 定义主机的sudo路径 |
| ansible_connection | 定义主机连接方式;与主机的连接类型.比如:local,ssh或者paramiko;Ansible 1.2以前默认使用paramiko。1.2以后的版本默认使用‘smart’,‘smart’方式会根据是否支持ControlPersist,来判断ssh方式是否可行 |
| ansible_ssh_private_key_file | 定义主机私钥文件 |
| ansible_shell_type | 定义主机shell类型 |
| ansible_python_interpreter | 定义主机python解释器路径 |
[webserver]
webserver01.com
webserver02.com

[webserver:vars]
ansible_ssh_private_key_file=~/singapore.pem
模块(Modules) #
Ansible功能的单元,一个Ansible功能对应有一个Module。
常用模块 #
file #
远程服务器上的文件进行操作。创建删除文件,修改文件权限等。
- path:执行文件、目录的路径
- recurse:递归设置文件属性,只对目录有效
- group:定义文件、目录的属组
- mode:定义文件、目录的权限
- owner:定义文件、目录的所有者
- src:要被链接的源文件路径,只应用与state为link的情况
- dest:被链接到的路径,只应用于state为link的情况
- force:在两种情况下会强制创建软链接,一种是源文件不存在但之后会建立的情况;一种是目标软链接已经存在,需要先取消之前的软链接,然后创建新的软链接,默认值 no。
ansible servers -m file -a 'path=~/temp state=directory'  # 创建目录
ansible servers -m file -a 'path=~/temp/test1.txt state=touch'  # 创建文件
copy #
将Control Node上的目录或文件拷贝至Managed Nodes。
- src:指定要复制到远程主机的文件或目录。如果路径以 / 结尾,则只复制目录里的内容,如果没有以 / 结尾,则复制包含目录在内的整个内容
- dest:文件复制的目的地,必须是一个绝对路径,如果源文件是一个目录,那么dest指向的也必须是一个目录
- force:默认取值为yes,表示目标主机包含此文件,但内容不同时,覆盖。
- backup:默认取值为no,如果为yes,在覆盖前将原文件进行备份
- directory_mode:递归设定目录权限,默认为系统默认权限
- others:所有file模块里的选项都可以在这里使用
touch test2.txt
ansible servers -m copy -a 'src=test2.txt dest=~/temp/test2.txt'  # 拷贝文件到服务器
command #
直接要求主机清单执行命令。
ansible servers -m command -a "touch ~/temp/test3.txt"
ansible servers -m command -a "sudo apt update"
ansible servers -m command -a "sudo apt install nginx -y"
ansible servers -m command -a "sudo apt autoremove nginx -y"
不支持shell变量,如$NAME, <,>,&,| 等
shell #
可以先编辑shell脚本,然后要求主机清单执行shell脚本里的命令。
- name: Execute the command in remote shell; stdout goes to the specified file on the remote.
  shell: somescript.sh >> somelog.txt

- name: Change the working directory to somedir/ before executing the command.
  shell: somescript.sh >> somelog.txt
  args:
    chdir: somedir/
注意:shell脚本必须有可执行的权限
    - name: 'chmod shell'
      command: chmod 777 somedir/somescript.sh
apt #
ubuntu/debian 包、应用管理。
update_cache : yes/no,默认no,操作之前是否 apt-get update
state :
- absent : 移除
- latest :最新
- present: 目前稳定的,默认
autoremove :yes/no,默认no,移除依赖
autoclean :yes/no,默认no,移除缓存
ansible servers -m apt -a "name=nginx update_cache=yes" -b

# append to playbook
- name: Install nginx
  apt:
    name: nginx
    state: latest
    update_cache: yes

ansible servers -m apt -a "name=nginx state=absent autoremove=yes autoclean=yes" -b
yum #
CentOs管理程序包。
service #
管理服务的模块,用来启动、停止、重启服务。
enabled :yes/no,默认no.是否开机启动。
name :服务名
state :
- reloaded
- restarted
- started
- stopped
sleep :如果是restarted,需要等待多长秒后再重启 如:10,等待10秒后重启
ansible servers -m service -a "name=nginx state=started"

# playbook
- name: Start service nginx, if not started
  service:
    name: nginx
    state: started

ansible servers -m service -a "name=nginx state=stoped"
unarchive #
解压缩。
git #
Managed需要已经安装git。
执行git相关操作。
任务(Tasks) #
Ansible执行的单元,一般放在Playbook中,多个Task一起执行,使用方便,可复用。
定义方式:
-name: names
  module: action
---
- name: ansible-playbook demo
  hosts: servers
  tasks:
    - name: create temp dir
      file:
        path: ~/temp
        state: directory

    - name: create test1.txt
      file:
        path: ~/temp/test1.txt
        state: touch

    - name: copy test2.txt
      copy:
        src: test2.txt
        dest: ~/temp/test2.txt

    - name: copy test.sh
      copy:
        src: test.sh
        dest: ~/temp/test.sh

    - name: 'chmod shell'
      command: chmod 777 ~/temp/test.sh

    - name: exec shell
      shell: ~/temp/test.sh
      args:
        executable: /bin/bash
Ansible用法 #
ansible命令 #
ansible <hosts> -m <module_name> -a <arguments> -i <hosts_path>
hosts:
- all 或 *,所有hosts文件中配置的主机
- ip address
- host name
- group name
- 多个host或group可用:分隔
- 支持正则匹配:如配置了一个webserver的主机,可用ansible ~web* -m ping匹配到
module_name:例如ping,command,apt的任务模块
arguments: 执行module的参数,例如
ansible -m command -a "touch hello.txt"hosts_path:主机清单文件位置,默认/etc/ansible/etc,也可以自己指定
Ansible命令参数 #
[-h]  # 帮助
[--version]  # Ansible版本
[-v]  # verbost
[-b]  # sudo运行,可以以sudo权限运行
[--become-method BECOME_METHOD]
[--become-user BECOME_USER]
[-K]  # 提示输入sudo密码,当不是NOPASSWD模式时使用
[-i INVENTORY]  # 指定hosts文件路径,默认default=/etc/ansible/hosts
[--list-hosts] # 打印有主机列表
[-o]  # 压缩输出,摘要输出
[-t TREE]
[-k] # 提示输入ssh登录密码。当使用密码验证的时候用
[--private-key PRIVATE_KEY_FILE]  # ssh连接的私钥文件位置
[-u REMOTE_USER] # ssh连接的用户名,默认用root,ansible.cfg中可以配置
[-c CONNECTION]  # 连接类型(default=smart),例如还有local
[-T TIMEOUT] # 超时限制
[--ask-vault-pass | --vault-password-file VAULT_PASSWORD_FILES]
[-f FORKS]   # fork多少个进程并发处理,默认为5个
[-M MODULE_PATH]  # 模块的执行文件位置,一般用于扩展模块
[--playbook-dir BASEDIR]
[-a MODULE_ARGS]  # 模块的参数
[-m MODULE_NAME] # 要执行的模块,默认为command
Anisble playbook #
预先定义好所有需要执行的操作,形成一个脚本文件,执行该脚本文件即可,方便管理和复用。
ansible-playbook -i <hosts_path> <playbook_path>
hosts_path:主机清单文件位置
playbook_path: playbook yaml文件位置
-C:加在ansible-playbook命令后,用于验证palybook文件是否有误
---
- name: Install prometheus on ubuntu
  hosts: prometheus
  become: yes
  tasks:
    - name: "Step 1: Import prometheus public GPG Key"
      apt_key:
        url: https://s3-eu-west-1.amazonaws.com/deb.robustperception.io/41EFC99D.gpg
        state: present
    - name: "Step 2: Reload local package database"
      apt:
        update_cache: yes
    - name: "Step 3: Install prometheus"
      apt:
        name: prometheus
        update_cache: yes
    - name: "Step 4: Install prometheus-node-exporter"
      apt:
        name: prometheus-node-exporter
        update_cache: yes
    - name: "Step 5: Install prometheus-pushgateway"
      apt:
        name: prometheus-pushgateway
        update_cache: yes
    - name: "Step 6: Install prometheus-alertmanager"
      apt:
        name: prometheus-alertmanager
        update_cache: yes
    - name: "Step 7: Start prometheus service"
      service:
        name: prometheus
        enabled: yes
        state: started
playbook 参数 #
name :标识plaoybook文件执行内容
hosts: inventory
become: yes/no,默认no,是否使用sudo执行
tasks : 预先定义好的ansible命令,managed node将从上到下执行
handles: 使用notify触发
# 修改nginx配置后,设置重启 - name: write the nginx config file template: src=/somepath/nginx.j2 dest=/data/nginx/conf/nginx.conf notify: - restart nginx handlers: - name: enable nginx service: name=nginx state=restartedwhen: 当满足条件时才执行,多条件可以使用and、or
tasks:
  - name: "shut down Debian flavored systems"
    command: /sbin/shutdown -t now
    when: ansible_os_family == "Debian"
常用用法**:
# --list-hosts(简写为--list)
ansible webserver --list-hosts
Ansible原理 #

ansible命令
ansible命令所使用的模块,参数
演示 #
- ansible.cfg
host_key_checking = False
remote_tmp = /tmp/.ansible-${USER}/tmp
- hosts主机清单
[ubuntu:vars]
ansible_ssh_private_key_file=~/singapore.pem

[ubuntu]
172.30.2.252 ansible_ssh_user=ubuntu

[mysql:vars]
ansible_private_key_file=~/dev-mysql.pem

[mysql]
172.31.22.159 ansible_ssh_user=ubuntu

[servers:children]
ubuntu
mysql
- ansible操作
# 创建目录
ansible servers -m file -a 'path=~/temp state=directory mode=0755'
# 创建文件
ansible servers -m file -a 'path=~/temp/test1.txt state=touch'

# Control Node分发文件至Managed Nodes
ansible servers -m copy -a 'src=index.html dest=~/temp/test2.txt'
踩坑记录 #
问题1
连接aws的linux实例时,需要在/etc/ansible/hosts定义的参数
[ubuntu:vars]
ansible_private_key_file=/home/ubuntu/singapore.pem

[ubuntu]
192.168.0.1 ansible_ssh_user=ubuntu
问题2
使用docker创建可以ssh连接的ubuntu容器,无法使用root连接,但是使用其他user时,在
ansible local -m ping时也会出现以下问题。Authentication or permission failure. In some cases, you may have been able to authenticate and did not have permissions on the remote directory. Consider changing the remote temp path in ansible.cfg to a path rooted in "/tmp"....其实上面的信息已经有了一些提示,修改/etc/ansible/ansible.cfg的remote_tmp配置
remote_tmp = /tmp/.ansible-${USER}/tmp问题3
如果在使用pem文件连接服务器时遇到
Permissions 0664 for '/home/ubuntu/dev-mysql.pem' are too open.\r\nIt is required that your private key files are NOT accessible by others.问题。修改文件权限即可
sudo chmod 400 /path/to/file.pem问题4
Failed to lock apt for exclusive operation
添加
become: yes
其他 #
预编译 #
python的版本兼容问题 #
ansible v2.7及更高版本默认优先支持python3,如果对特定的host支持单独的python版本,可以通过设置ansible_python_interpreter inventory参数设置。
[webservers]
webserver1.com ansible_python_interpreter=/usr/bin/python2.4